
I have been meaning to update this blog for years, so here goes. This blog is going to cover what I recommend to get the most data from iOS and Android devices. Many tools exist to successfully extract data from mobile devices and I am sharing some of my favorite methods that have proven to be successful for me over the years.
ANDROID Acquistion
Since most devices are using File Based Encryption (FBE), physical acquisition may not be possible. For devices that can be physically acquired, that should render the most data. The next best option to collect the most data from the phone is Full File System access. HOT devices should be acquired quickly. To explain HOT – If the device is in an AFU (after first unlock) state, make sure you acquire it and ensure the device doesn’t reboot, if possible. A reboot will put the device into a BFU (before first unlock) state and may be difficult or impossible to acquire without the passcode.
Things you will need:
- Install ADB on your forensic workstation https://www.xda-developers.com/install-adb-windows-macos-linux/
- Your forensic tools of choice.
- Mattia Epifani’s Android Triage script https://blog.digital-forensics.it/2021/03/triaging-modern-android-devices-aka.html
Android Acquisition Recommended Steps:
- Obtain a Physical or Full File System extraction with Cellebrite UFED, Premium or Premium ES. These are my preferred tools, others can be used as well.
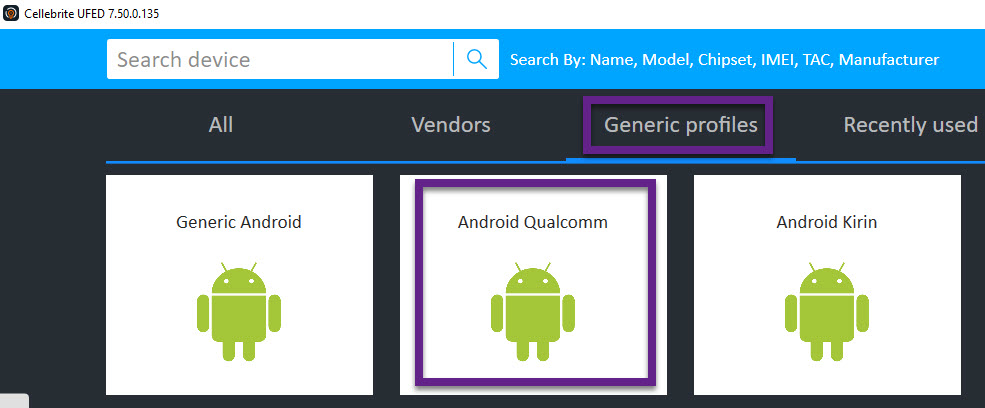
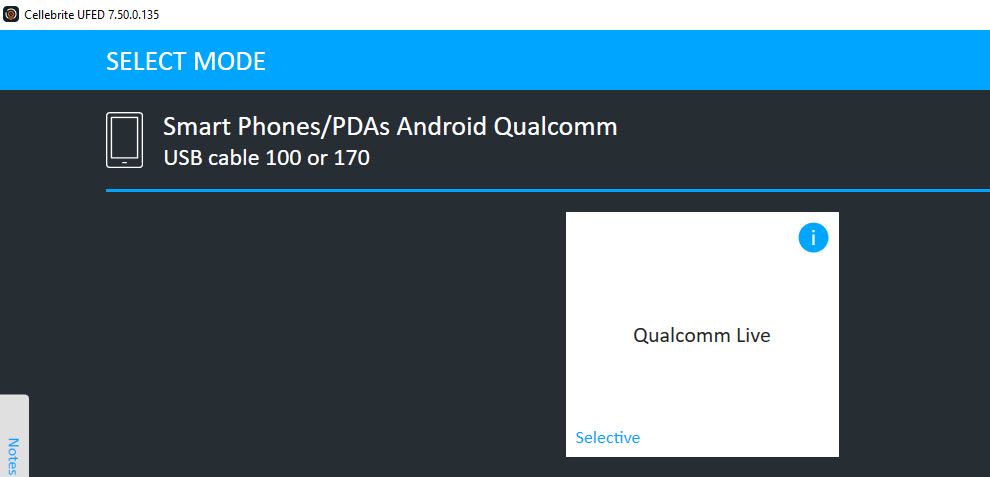
- If a Full File System is not possible for a specific model, verify the chipset and try Android Qualcomm/Qualcomm Live under Generic profiles.
- Make sure you open the extraction prior to returning the device to ensure the data is not encrypted!
- File System Acquisition
- This may simply be a backup and backups don’t get a lot with newer Android devices.
- Try Generic Android on Cellebrite UFED if you are not finding the specific model to be working.
- Logical Acquisition using a forensic tool – especially if ADB isn’t going well for you. I recommend using more than one tool or a single tool and also capturing an ADB backup for validation purposes.
- Note that most tools will install a software agent in order to extract data from the device. This is normal and accepted. If you are ever questioned on what the software agent is doing, simply extract the APK and examine it manually to review the permissions.
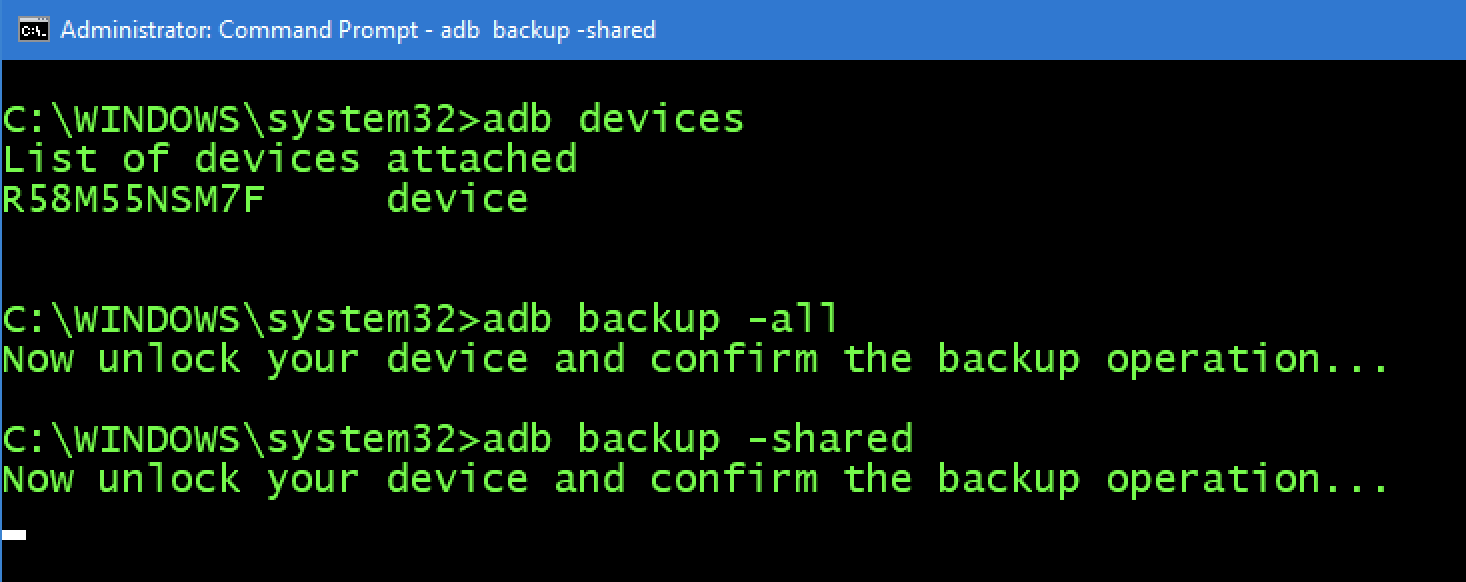
- FREE WAY – ADB Backup (capture both the device (all) and SD/media (shared))
- adb backup –all
- adb backup – shared
- Make sure you acquire the SD card and SIM card if one is present.
- I like to remove these and acquire separately to ensure nothing is overlooked.
- Make sure you write-protect the SD card.
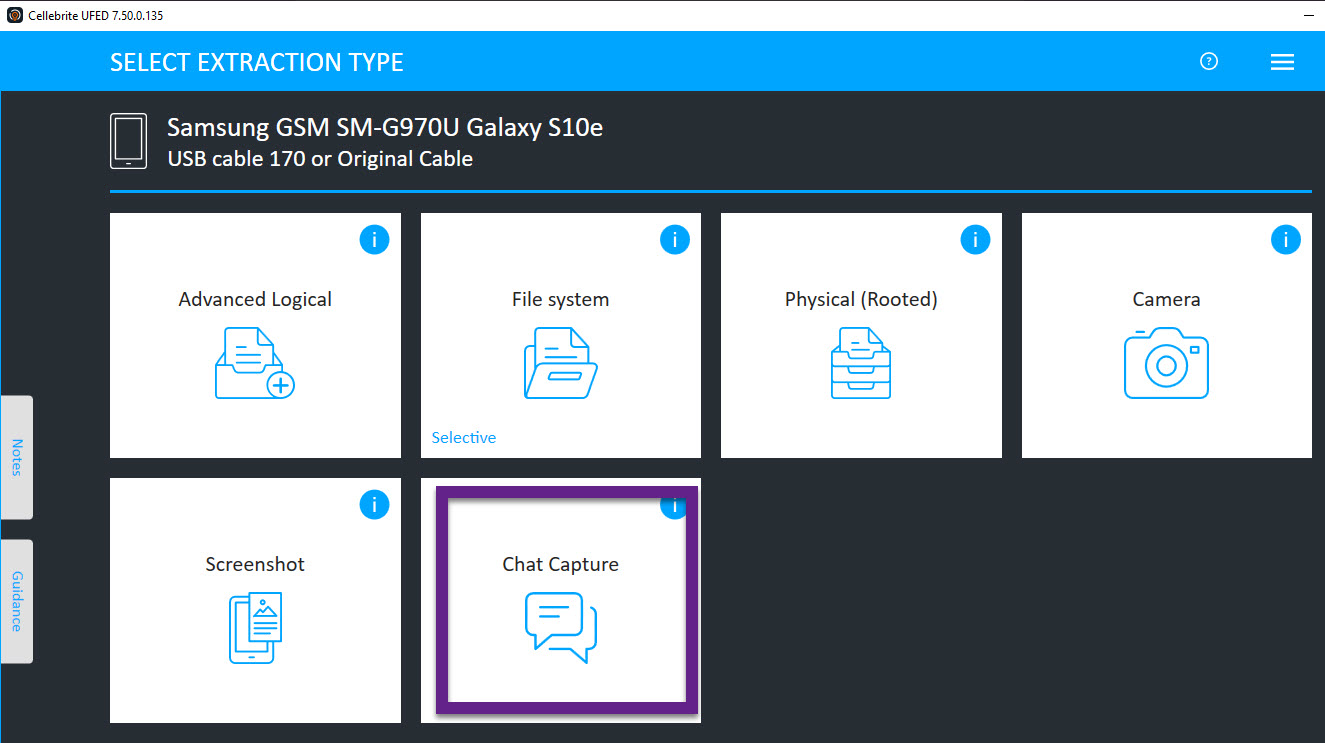
- Use Cellebrite UFED to conduct a Chat Capture. I love the generic option as any screen can be captured and parsed for analysis.
- I like to use chat capture to grab the settings screen of the device and to access application data that may not be extracted with the methods above. This method is great for apps that are not parsed or extracted.
- Extract cloud data – IF YOU HAVE AUTHORITY! My tools of choice for this are Physical Analyzer and Elcomsoft. Magnet and Oxygen work well too.
- I like to run some ADB commands to the device to ensure I extracted all information and that I am aware of what exists on the Android. The script from Mattia that is mentioned above can capture all of these commands for you with a nice GUI.
- ALWAYS open the extraction to ensure you got what you hoped. If you have a physical dump, Autopsy is the fastest you will gain access to your data! And it’s free. (https://www.sleuthkit.org/autopsy/). You can also use FTK Imager or a similar tool that is free for quick access.
Android acquisition leaves traces behind on the device. If you conduct covert operations – tread carefully here. Don’t go too far without knowing the footprint your tools and methods are leaving behind. These topics are covered more in the FOR585 class http://for585.com/course, in blogs and webinars found at https://www.cellebrite.com/en/resources/. Also note that multiple extractions may be necessary to capture the most information from these devices.
iOS Acquisition Recommendations
For iOS acquisition my methods have remained steady and I am not as paranoid as I am with Android. You can choose to work on a Windows or Mac. I do both. Honestly, most of my acquisitions take place on my Windows forensic workstation, but I do have a Mac that I use for jailbreaking.
Things you will need:
- Install iTunes if you plan to create a backup on Windows. Finder will work on the Mac.
- Install iBackupBot (I prefer this tool over the other free ones because of the option to dump the crash logs http://www.icopybot.com/download.htm
- Your forensic tools of choice.
- ArtEx – if you are examining a jailbroken device. Read Ian Whiffin’s blogs! http://www.doubleblak.com
Recommended iOS Steps:
- Determine the iOS device type and type of iOS device.
- Obtain a Full File System Extraction.
- I prefer using Cellebrite UFED checkm8.
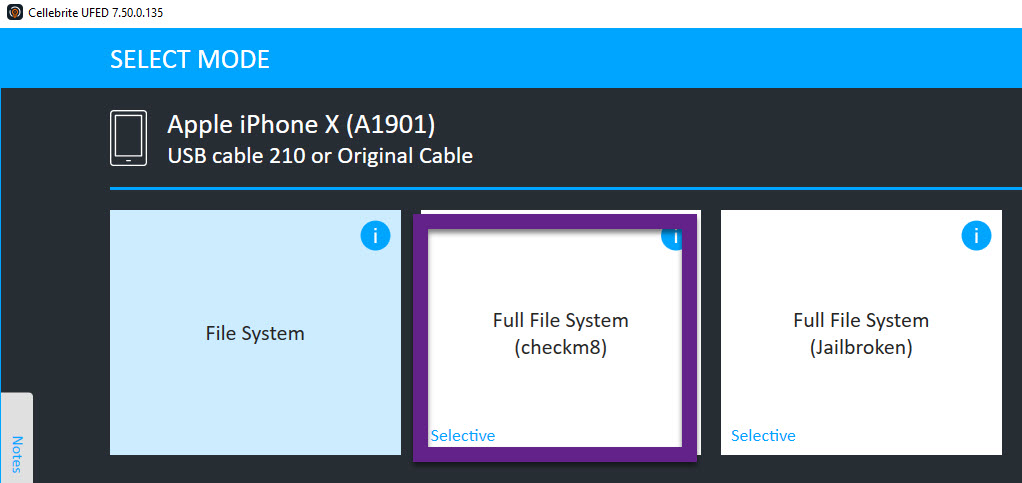
- If the device is already jailbroken, I will use Cellebrite UFED Full File System. Other tools will work as well.
- If I get a Full File System extraction I stop at this point other than obtaining log files, which is mentioned in steps 6 and 7.
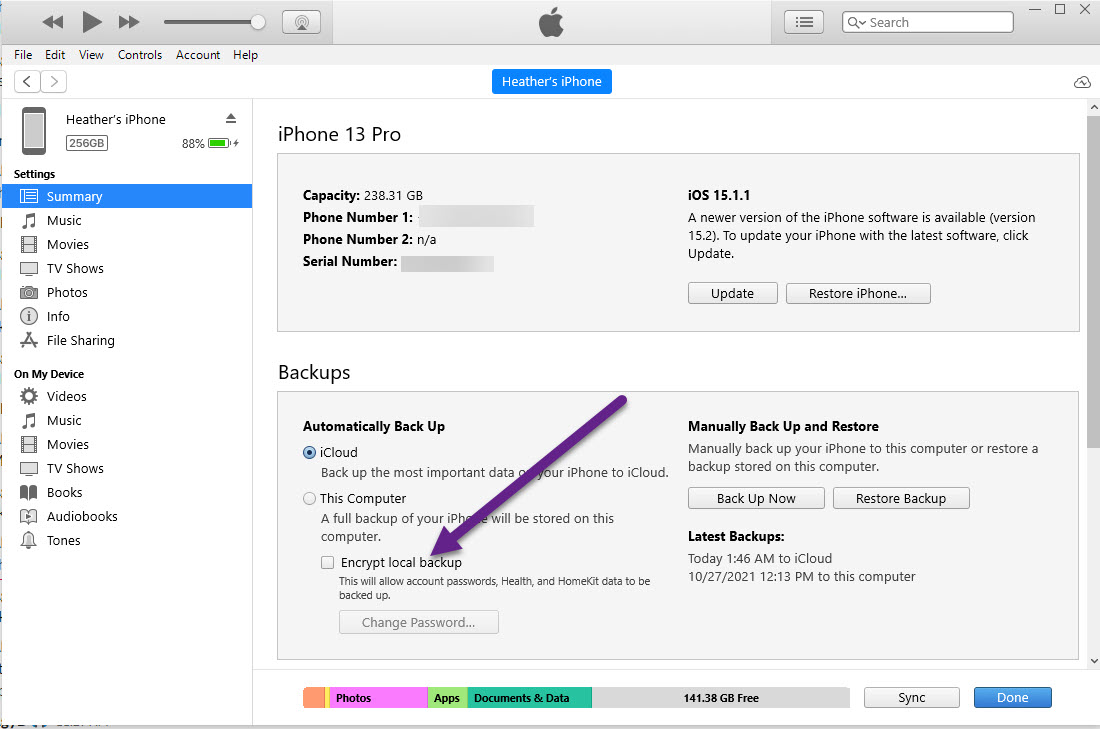
- Conduct a File System/Advanced Logical Extraction – YOU MUST ENCRYPT the extraction!
- This can be done in most tools. I use Cellebrite UFED and make sure to encrypt the backup. Cellebrite will use 1234 to do this.
- If using another tool make sure the option to encrypt the extraction is there or you will MISS a lot of data starting with iOS 13. Refer to my other blogs for more information on this.
- If you want to be thorough, obtain a logical and/or backup file of the device. I typically stop at the Full File System or file system dump since it contains the backup if I trust my tool (refer to my old blog for more info on this topic).
- Connect the device to iBackup bot and export the crash logs.

- Collect sysdiagnose logs and extract them. This can be done nicely with Elcomsoft. More information is at www.for585.com/sysdiagnose
- Ensure the tools you used did not enable iTunes encryption by connecting the device to iTunes and making sure “Encrypt Backup” is not selected. This should be performed prior to giving the device back to the suspect/custodian/witness.
- Extract cloud data – IF YOU HAVE AUTHORITY! I prefer the same tools mentioned above in the Android part of this blog.
Everyone has their preferences on tools and acquisition methods. A Full File System is the best bang for your buck on most devices. Make sure you validate your extracted data and reach out to the vendors you leverage if issues arise.